


Is your garden hose leaking or not working like it used to? A broken hose can quickly turn your watering routine into a frustrating task.
But don’t worry—you don’t need to buy a new one just yet. Fixing your garden hose is easier than you think, and with a few simple steps, you can save time and money. Keep reading, and you’ll learn how to spot common problems and repair your hose so it works like new again.
Your garden—and your wallet—will thank you!

Credit: www.youtube.com
Common Garden Hose Problems
Garden hoses face many issues that stop water flow. Fixing them can save water and money.
Knowing common problems helps you repair the hose quickly. This guide covers leaks, kinks, and fittings.
Leaks And Holes
Leaks and holes let water escape and reduce pressure. These usually happen from wear or sharp objects.
- Find leaks by running water through the hose and checking for wet spots.
- Use waterproof tape or hose repair kits to cover small holes.
- Replace damaged hose sections if holes are large or many.
- Store the hose away from sharp edges to avoid new leaks.
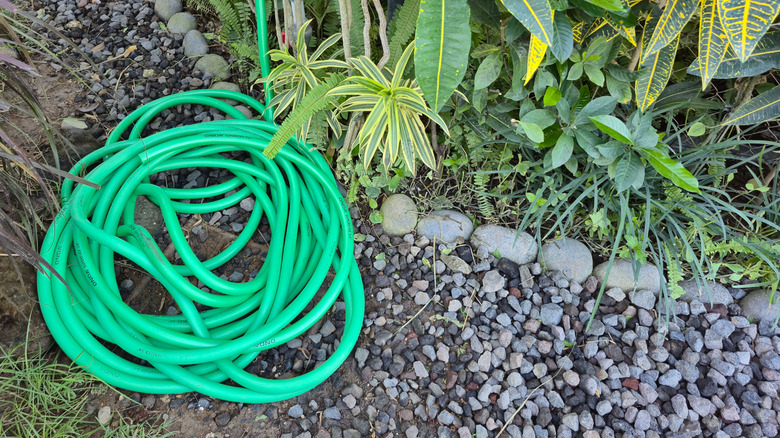
Kinks And Twists
Kinks block water flow and can cause damage. Twists make the hose hard to use and shorten its life.
| Problem | Cause | Solution |
| Kinks | Sharp bends or poor storage | Straighten hose and coil loosely |
| Twists | Twisting when unrolling or rolling | Rotate hose while unwinding |
Worn Out Fittings
Fittings connect the hose to water sources and tools. Wear causes leaks and poor connections.
To fix worn fittings:
- Turn off water and remove the fitting.
- Check for cracks or worn threads.
- Replace washers or the entire fitting if needed.
- Use plumber’s tape on threads to stop leaks.
- Tighten fittings firmly but do not over-tighten.

Credit: www.familyhandyman.com
Tools And Materials Needed
Fixing a garden hose is simple with the right tools and materials. You can save water and avoid buying a new hose.
Gather these items before starting your repair. It will make the job easier and faster.
Basic Repair Kit
A basic repair kit has the essential tools for fixing most garden hoses. It helps you cut, connect, and seal leaks.
These kits are easy to use and usually include everything you need.
- Garden hose cutter or sharp scissors
- Hose connectors or couplings
- Replacement washers
- Pliers or wrench
- Utility knife
Sealants And Tape
Sealants and tape help stop leaks and keep your hose watertight. They are important for a strong repair.
You can find different types designed for outdoor and water use.
- Waterproof silicone sealant
- Teflon tape (plumber’s tape)
- Rubber repair tape
- Waterproof adhesive tape
Replacement Parts
Replacement parts restore broken or worn hose sections. They ensure a secure and leak-free connection.
Keep these parts handy to fix common hose problems quickly.
- Hose end fittings
- Hose clamps
- Rubber washers and gaskets
- Quick connectors
Fixing Leaks And Holes
Garden hoses can develop leaks and holes over time. Fixing them helps save water and keeps your hose working well.
This guide explains easy ways to repair your garden hose using repair tape, sealant, or replacing parts.
Using Repair Tape
Repair tape is a simple fix for small leaks and holes. It wraps tightly around the damaged area and stops water from escaping.
- Turn off the water supply and dry the hose.
- Cut a piece of repair tape longer than the damaged spot.
- Wrap the tape around the hole, stretching it as you go.
- Cover the area fully and press the tape firmly.
- Wait a few minutes before turning the water back on.
Applying Sealant
Sealant fills holes and cracks to stop leaks. It works best on clean, dry hose surfaces.
| Sealant Type | Best For | Drying Time |
| Rubber Cement | Small holes and cracks | 10–15 minutes |
| Silicone Sealant | Flexible repairs, larger holes | 1–2 hours |
| Epoxy Putty | Strong, permanent fixes | 5–30 minutes |
Apply a thin layer over the hole. Let it dry fully before using the hose again.
Replacing Damaged Sections
Sometimes the hole is too big or the hose is too damaged. Replacing the section is a better choice.
- Cut out the damaged part with a sharp knife or scissors.
- Use hose connectors to join the new section to the old hose.
- Push the hose ends firmly into the connectors.
- Tighten clamps around the connectors for a secure fit.
- Test the hose for leaks by turning the water on slowly.
Untangling Kinks And Twists
Garden hoses often get twisted and kinked during use or storage. These kinks block water flow and can damage the hose. Fixing these problems helps the hose work better and last longer.
Untangling kinks requires care and the right approach. You can straighten the hose safely by following simple steps.
Proper Straightening Techniques
First, lay the hose out in the sun for a while. The heat softens the plastic, making it easier to straighten. Next, start from one end and gently pull the hose to remove twists.
If you find a sharp kink, try bending the hose in the opposite direction slowly. Avoid using sharp tools that might damage the hose. Rolling the hose back and forth can also help smooth out kinks.
- Lay hose in sunlight to soften it
- Pull gently to remove twists
- Bend kinks slowly in the opposite direction
- Roll hose to smooth out sharp bends
- Avoid sharp tools or excessive force
Preventing Future Kinks
Store your garden hose properly after use. Coil it loosely in large loops. Avoid tight circles or folding the hose sharply. Use a hose reel or hanger if possible.
When watering, avoid pulling the hose around corners or objects that cause twists. Straighten the hose as you use it. This simple care keeps the hose smooth and stops kinks from forming again.
- Coil hose in large, loose loops
- Use a hose reel or hanger
- Avoid sharp bends or folding
- Keep hose straight while watering
- Store hose in a dry, shaded place
Repairing Or Replacing Fittings
Garden hoses can leak or break at the fittings. Fixing or replacing these parts saves water and money. This guide shows how to handle hose fittings easily.
Follow simple steps to remove old fittings, add new connectors, and make tight, leak-free joints.
Removing Old Fittings
Start by turning off the water supply and draining the hose. This stops water from leaking during repair.
Use pliers to grip the old fitting. Twist it counterclockwise to unscrew. If it is stuck, apply a little penetrating oil and wait.
- Turn off water and drain hose
- Grip fitting with pliers
- Twist counterclockwise to remove
- Use oil if fitting is stuck
Installing New Connectors
Choose the right size and type of connector for your hose. Push the hose end firmly into the new fitting.
Make sure the connector fits snugly. Some connectors need clamps to hold the hose in place.
- Select correct connector size
- Push hose end into fitting
- Use clamps if needed for support
Securing Tight Connections
Use a hose clamp to secure the fitting tightly. Place the clamp over the connection point and tighten with a screwdriver.
Check for leaks by turning on the water slowly. If water drips, tighten the clamp more or adjust the fitting.
- Place hose clamp on connection
- Tighten clamp with screwdriver
- Turn water on to test for leaks
- Adjust fitting or clamp if needed

Credit: www.reddit.com
Maintenance Tips For Longevity
Keeping your garden hose in good shape saves money and time. Small care steps prevent leaks and cracks.
Follow simple tips to store, inspect, and protect your hose through all seasons.
Proper Storage Methods
Store your garden hose in a cool, dry place away from direct sunlight. Avoid sharp bends or kinks to keep water flowing well.
- Use a hose reel or hanger to keep it off the ground
- Drain all water before storing to prevent freezing damage
- Keep the hose away from chemicals and rough surfaces
Regular Inspection
Check your hose often for leaks, cracks, and loose fittings. Early fixes stop bigger problems.
| Issue | Signs | Solution |
| Leaks | Water drips or sprays | Replace washers or tape threads |
| Cracks | Visible splits on hose surface | Patch small cracks or replace hose |
| Loose fittings | Hose disconnects easily | Tighten or replace connectors |
Seasonal Care
Prepare your hose for changing weather. Cold winters and hot summers can cause damage.
Follow these seasonal steps:
- In fall, drain the hose completely before storage.
- In winter, keep the hose indoors or in insulated areas.
- In spring, check for damage before use.
- In summer, avoid leaving the hose in direct sun for long periods.
Frequently Asked Questions
How Do You Fix A Leaky Garden Hose?
To fix a leaky garden hose, first locate the leak. Use rubber hose repair tape or a hose repair kit. For small leaks, wrap the tape tightly around the area. For larger damage, cut out the damaged section and use a repair kit to join the hose ends.
What Causes Garden Hose Leaks?
Garden hose leaks are often caused by wear and tear, exposure to harsh weather, or physical damage. Over time, hose materials can degrade, leading to cracks or holes. Improper storage, such as kinking or bending, can also weaken the hose structure, causing leaks.
How Do You Fix A Garden Hose Connector?
To fix a garden hose connector, unscrew the damaged connector. Replace it with a new one from a hardware store. Ensure the new connector is the correct size and type. Tighten it securely using a hose clamp or adjustable wrench to prevent future leaks.
Can A Garden Hose Be Repaired Easily?
Yes, a garden hose can be easily repaired. Identify the problem area first. Use basic tools and repair kits available at hardware stores. Follow instructions carefully for the best results. With proper repair, your hose can function effectively again without the need for replacement.
Conclusion
Fixing a garden hose is easier than it seems. Small leaks and cracks do not need a replacement. With simple tools and steps, you save money and time. Regular checks help keep your hose working well. A good hose means a healthy garden.
Try these tips to keep your hose in top shape. Enjoy watering without worries or mess. Simple fixes make a big difference in your garden care.