

Are you dreaming of a beautiful garden that stands out? A stone wall can add charm, structure, and a timeless look to your outdoor space.
But how do you build one that lasts and looks great? This guide will show you simple, clear steps to create your own stone wall, even if you’ve never done it before. By the end, you’ll have the confidence to transform your garden with a sturdy, stunning wall that’s all your own.
Ready to get started? Let’s dive in.

Credit: www.youtube.com
Choosing The Right Stone
Building a stone wall for your garden starts with picking the right stone. The stone you select affects the wall’s look and how long it lasts.
Knowing the types of stones and their qualities helps you make a smart choice. This guide covers the main points to consider.
Types Of Garden Stones
There are many stones to use in garden walls. Each stone has a unique look and texture that fits different garden styles.
- Fieldstone: Round, natural stones that give a rustic look
- Limestone: Smooth, light-colored stones that look classic
- Sandstone: Soft, warm-colored stones with a natural feel
- Granite: Hard, strong stones with a speckled pattern
- Slate: Flat, thin stones with dark colors for neat walls
Selecting Durable Materials
Durability is important for garden walls. Choose stones that resist weather and last many years. This keeps your wall strong.
Hard stones like granite and limestone are good for tough weather. Avoid soft stones that can break or wear quickly.
- Check for hard, dense stones
- Look for stones that do not absorb water easily
- Avoid stones with many cracks or holes
- Pick stones that keep their shape over time
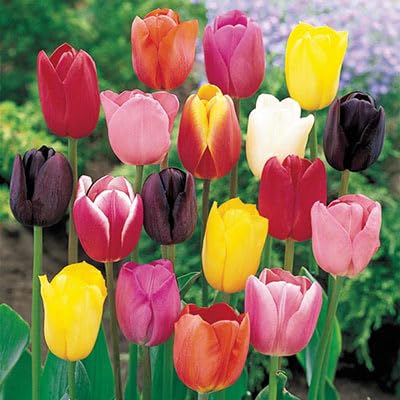
Matching Stones To Your Garden Style
Your garden’s style should guide your stone choice. The right stone makes your garden look balanced and attractive.
Rustic gardens suit rough, natural stones like fieldstone. Modern gardens fit smooth, clean stones like slate or granite.
- Use warm-colored stones for cozy gardens
- Choose cool-colored stones for sleek, modern looks
- Mix stone shapes for a natural feel
- Keep stone size consistent for formal styles

Credit: stratastones.co.uk
Preparing The Site
Building a stone wall in your garden starts with good preparation. Taking time to prepare the site ensures the wall will be strong and look great.
Careful planning and groundwork make the building process easier. Follow these steps to get your site ready for the stone wall.
Marking The Wall Layout
First, decide where the wall will go. Use stakes and string to mark the wall’s shape and length on the ground. This helps keep the wall straight and even.
- Place wooden stakes at the corners and ends of the wall
- Run string tightly between the stakes to outline the wall
- Check the layout from different angles to ensure straight lines
- Adjust the stakes and string if needed before digging
Clearing And Leveling Ground
Clear the area inside the layout by removing grass, roots, and debris. Then level the ground to create a flat surface. This step stops the wall from shifting later.
| Task | Tools Needed | Tips |
| Remove grass and plants | Shovel, rake | Dig a few inches deep to clear roots |
| Clear rocks and debris | Gloves, wheelbarrow | Dispose of debris away from the site |
| Level the soil | Rake, tamper | Check level with a board and level tool |
Setting A Solid Foundation
A strong foundation keeps the wall stable. Dig a trench along the marked line. The trench should be deep and wide enough for the stones and base material.
- Dig the trench about 6 to 12 inches deep, depending on wall height
- Make the trench about twice as wide as the stones you will use
- Add a layer of gravel or crushed stone to the bottom for drainage
- Compact the gravel using a tamper to create a firm base
Tools And Materials Needed
Building a stone wall for your garden needs the right tools and materials. These help you work safely and get a strong wall.
This guide covers the essential tools, mortar and adhesives, and safety equipment you need for the job.
Essential Tools For Stone Walls
Stone wall building requires specific tools to shape and place stones properly. Using these tools makes your work easier and more precise.
- Chisel – to shape and split stones.
- Hammer – for striking chisels and fitting stones.
- Masonry trowel – for spreading mortar evenly.
- Spirit level – to keep the wall straight and level.
- Measuring tape – to measure stone placement and wall length.
- Wheelbarrow – to mix and carry mortar and stones.
- Gloves – to protect your hands from rough stones.
- Brush – to clean dust off stones before laying.
Mortar And Adhesives
Mortar holds the stones together and makes the wall strong. You must choose the right type of mortar for your garden wall.
Common mortar types include cement mortar and lime mortar. Some builders use special adhesives for added strength.
- Cement mortar – strong and fast-setting.
- Lime mortar – flexible and good for older walls.
- Stone adhesive – used for dry stone walls without mortar.
- Sand – mixed with cement or lime to make mortar.
- Water – needed to mix mortar properly.
Safety Equipment
Safety is important when building a stone wall. Stones are heavy and tools can cause injury if not used carefully.
Use the right safety equipment to protect yourself during the work.
- Work gloves – protect your hands from cuts and scrapes.
- Safety glasses – guard your eyes from flying debris.
- Dust mask – prevents dust inhalation when mixing mortar.
- Sturdy boots – protect feet from falling stones.
- Ear protection – use if you work with loud tools.
Building The Wall
Building a stone wall for your garden takes patience and care. Each step shapes a strong and lasting structure.
This guide covers laying the first course, stacking stones properly, using mortar, and checking for level and alignment.
Laying The First Course
Start by preparing a solid, flat base for your stones. Clear the area and dig a trench about six inches deep.
Place the largest and flattest stones in the trench. This first layer holds the whole wall steady.
Stacking Stones Properly
Stack stones so they overlap joints, making the wall stronger. Avoid lining up vertical cracks in stones.
- Fit stones tightly together to reduce gaps
- Use smaller stones to fill spaces
- Keep the wall’s face even and straight
- Place heavier stones at the bottom
- Check each stone’s stability before adding the next
Using Mortar Effectively
Mix mortar to a thick, spreadable consistency. Apply mortar between stones to hold them together.
Tips for using mortar:
- Apply a layer of mortar on the stone below
- Press each stone firmly into the mortar
- Fill joints completely to avoid air gaps
- Keep excess mortar off stone faces
Checking For Level And Alignment
Use a spirit level to keep stones horizontal. Check vertical alignment with a plumb line or level.
| Tool | Purpose |
| Spirit Level | Check stones are flat and even |
| Plumb Line | Ensure wall is straight vertically |
| Measuring Tape | Keep consistent wall length and height |
Finishing Touches
After building your garden stone wall, the final steps make it last and look great. Finishing touches protect the wall and give it a neat appearance.
These steps include capping the wall, cleaning excess mortar, and sealing the surface for durability.
Capping The Wall
Capping the wall means adding a top layer of flat stones. This protects the wall from water damage and gives it a finished look.
- Choose flat, wide stones for the cap.
- Place each stone so it slightly overhangs the wall edge.
- Use mortar to fix the cap stones securely.
- Check the alignment to keep the top level.
Cleaning Excess Mortar
Remove mortar spills before it hardens. This keeps the stones clean and sharp-looking.
Tips for cleaning mortar:
- Use a stiff brush and water to scrub fresh mortar.
- For hardened mortar, carefully chip it away with a chisel.
- Wear gloves and eye protection when cleaning.
- Work gently to avoid damaging the stones.
Sealing For Longevity
Sealing the stone wall helps stop water, dirt, and moss from damaging it. This makes the wall last longer.
| Sealer Type | Benefits | Application Method |
|---|---|---|
| Penetrating Sealer | Protects inside stone pores, natural look | Brush or spray on surface |
| Film-Forming Sealer | Creates surface barrier, glossy finish | Roller or brush application |
| Water Repellent | Blocks water, allows breathability | Spray or brush on clean stone |

Credit: www.youtube.com
Maintenance Tips
Building a stone wall for your garden is just the start. Proper care keeps it strong and beautiful.
Regular maintenance stops small problems from becoming big issues. Follow simple tips to protect your wall.
Regular Inspection
Check your stone wall often. Look for loose stones or cracks that can grow over time.
Inspect after storms or heavy rains. Early spotting helps you fix problems quickly and save money.
Repairing Cracks And Loose Stones
Fix cracks as soon as you see them. Use mortar to fill gaps and keep stones in place.
Replace any loose stones carefully. Make sure they fit tightly with the rest of the wall.
- Remove debris from cracks before repairs
- Use matching mortar for a neat look
- Wear gloves and safety glasses while working
Preventing Water Damage
Water can weaken your stone wall. Make sure water drains away from the wall base.
Keep gutters and downspouts clean to avoid excess water near the wall. Add gravel or soil slopes to guide water away.
- Check drainage paths regularly
- Use sealants on stones if needed
- Trim plants that hold moisture near the wall
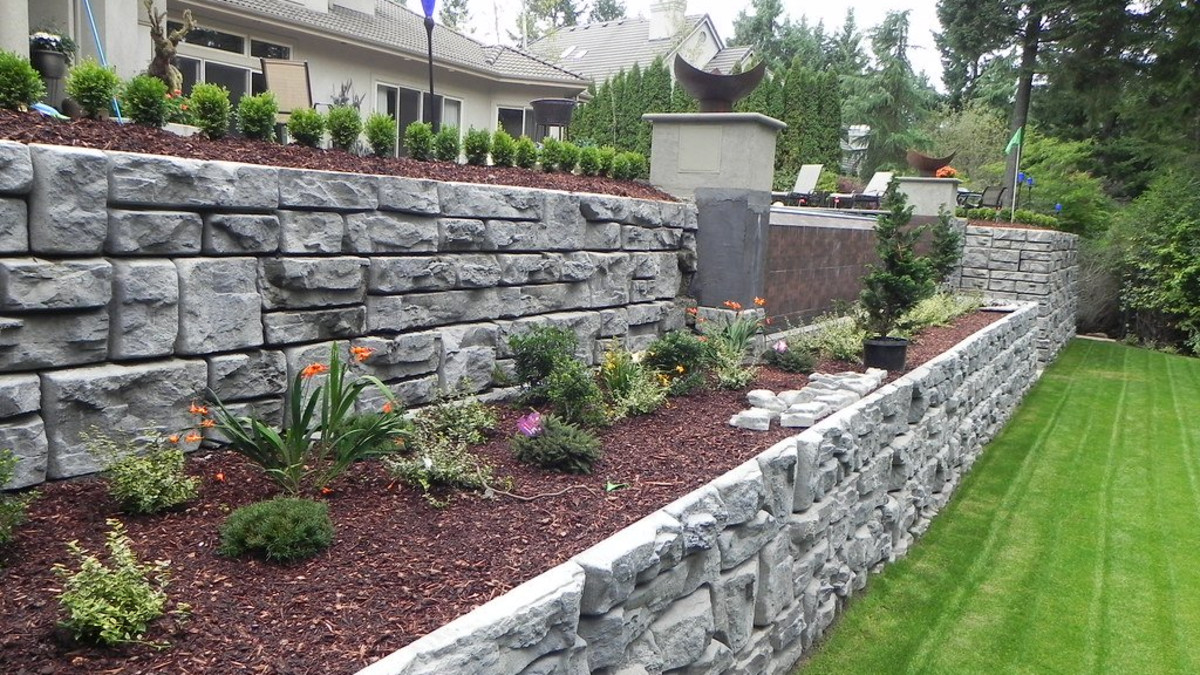
Creative Design Ideas
Building a stone wall for your garden can add charm and function. You can make it look unique with creative design choices. Using plants, lighting, and stone patterns can brighten your garden space.
Here are some ideas to help you design a stone wall that stands out and fits your garden style.
Incorporating Plants And Flowers
Adding plants and flowers around and on your stone wall creates a natural look. Choose plants that grow well in your area. Mix tall and short plants for variety.
- Plant climbing vines to grow over the wall
- Use small flower pots on top of wide stones
- Add herbs in the gaps between stones
- Place colorful flowers at the base for contrast
Adding Lighting Features
Lighting can highlight your stone wall at night. Soft lights can create a cozy mood. Use solar or low-voltage lights for easy installation.
| Type of Lighting | Placement | Effect |
|---|---|---|
| Spotlights | At the base pointing up | Highlights texture of stones |
| String Lights | Along the top edge | Creates a warm glow |
| Path Lights | Near the wall walkway | Improves safety and ambiance |
Using Mixed Stone Patterns
Mixing different stone types and sizes gives your wall a creative look. Combine smooth and rough stones for texture. Use colors that match your garden theme.
- Alternate large and small stones in each row
- Use flat stones for the top layer to create a smooth finish
- Mix colors like gray, brown, and white stones
- Add decorative stones or tiles for accents
Frequently Asked Questions
What Materials Are Best For Building A Garden Stone Wall?
Natural stones like limestone, sandstone, and granite work best. They are durable, weather-resistant, and blend well with garden aesthetics. Choose stones based on your garden style and local availability for cost-effectiveness and harmony with nature.
How Do I Prepare The Ground For A Stone Wall?
Clear the area of plants and debris. Level the ground and dig a trench 6-8 inches deep. Add a gravel base for drainage and stability before laying stones to ensure a strong foundation.
What Tools Are Needed To Build A Garden Stone Wall?
Essential tools include a shovel, level, hammer, chisel, and trowel. You may also need gloves and safety goggles. These tools help in digging, shaping stones, and ensuring the wall is even and secure.
How Long Does It Take To Build A Stone Garden Wall?
Time depends on wall size and complexity. Small walls may take a day, while larger projects take several days. Proper planning and preparation speed up the process and ensure quality results.
Conclusion
Building a stone wall adds charm and structure to your garden space. Choose strong stones and plan your layout carefully. Take your time to place each stone firmly and evenly. A well-built wall can last for many years with little care.
Enjoy the process and the natural beauty it brings. Your garden will feel more inviting and complete. Small steps lead to a great result. Start your project with confidence and patience. You will be proud of your sturdy stone wall.