


Have you ever looked at your garden sprayer and wondered if it could double as a paint sprayer? It sounds like a clever idea—using a tool you already own to tackle a new project.
But before you mix paint with your garden gear, there are important things you need to know. Can your garden sprayer handle paint? Will it give you the smooth finish you want, or end up making a mess? Keep reading, and you’ll discover the surprising truth about using a garden sprayer for paint, plus tips to help you decide if it’s right for your next DIY job.
Types Of Garden Sprayers
Garden sprayers come in different types. Each type serves specific needs for spraying liquids.
You can use some garden sprayers for paint, but choosing the right type is important.
Handheld Sprayers
Handheld sprayers are small and easy to use. They hold a small amount of liquid.
They work well for light jobs and small areas. You pump or press a trigger to spray.
- Lightweight and portable
- Good for small paint jobs
- Limited tank size
- Easy to control spray
Backpack Sprayers
Backpack sprayers have a tank you carry on your back. They hold more liquid than handheld sprayers.
These sprayers are better for larger areas. They let you spray evenly over walls or fences.
- Higher capacity tanks
- Hands-free carrying
- Good for medium to large jobs
- Requires pumping or battery power
Pump Sprayers
Pump sprayers come in many sizes and shapes. You build pressure by pumping air into the tank.
They can spray paint if cleaned well. They offer strong spray and cover large surfaces.
- Manual pumping creates pressure
- Available in various tank sizes
- Good for thick liquids like paint
- Needs thorough cleaning after use

Credit: www.amazon.ca
How Garden Sprayers Work
Garden sprayers help spread liquids like water and pesticides evenly. They use pressure to push the liquid through a nozzle.
Understanding how these sprayers work can help you know if they are suitable for other uses, such as painting.
Basic Mechanism
A garden sprayer has a container to hold the liquid. A pump is attached to build pressure inside the container.
- The pump pushes air into the container.
- Pressure builds up inside the sealed space.
- This pressure forces the liquid out through the nozzle.
- The nozzle controls the spray pattern and flow.
Pressure Generation
| Type of Pump | Pressure Range | Effect on Spray |
| Hand Pump | 20-40 PSI | Steady spray, good for liquids with low viscosity |
| Trigger Pump | 10-30 PSI | Controlled bursts, ideal for spot spraying |
| Battery Pump | 30-60 PSI | Consistent spray, supports longer use |
Pressure affects how well the liquid sprays out. Higher pressure means finer mist and wider coverage.
Suitability For Paint Application
Using a garden sprayer for paint can be tempting due to its availability. But you must check if it fits paint use. Not all sprayers handle paint well.
Paint needs special care in spraying tools. The sprayer material and paint type affect the results. This guide looks at key points for using garden sprayers with paint.
Sprayer Material Compatibility
Garden sprayers are mostly made for water and light chemicals. Paints can be thick and harsh. Some sprayer parts may break or clog.
- Plastic partscan swell or crack from solvent-based paints.
- Rubber sealsmay degrade with oil-based paints.
- Metal nozzlesresist wear but can rust if not cleaned well.
- Hosesmight block from thick paint drying inside.
Always check the sprayer’s material safety with your paint type. Cleaning the sprayer right after use can save the tool for future jobs.
Paint Types And Viscosity
Paint thickness affects how well it sprays. Thin paints flow easily. Thick paints need thinning or special sprayers.
| Paint Type | Viscosity Level | Use with Garden Sprayer? | Notes |
| Water-based (Latex) | Medium | Possible | May need thinning for smooth spray |
| Oil-based | High | Not recommended | Can damage sprayer seals |
| Enamel | High | Not recommended | Thick and tough on sprayer parts |
| Stain | Low to Medium | Possible | Use with proper cleaning |
:strip_icc()/bhg-paint-sprayers-test-graco-17g180-magnum-prox19-melissa-inman-29-0cfbde80d51a41a287c187c98963b4ba.jpeg)
Credit: www.bhg.com
Preparing Garden Sprayers For Paint
Using a garden sprayer for paint needs good preparation. This ensures a smooth painting job and protects your sprayer.
Two key areas to focus on are cleaning and maintenance, and choosing the right nozzle for paint application.
Cleaning And Maintenance
Before using a garden sprayer for paint, it must be very clean. Any dirt or leftover chemicals can spoil the paint job.
- Empty the sprayer completely and rinse it with water.
- Use a mild detergent to clean the tank and parts.
- Flush the hose and nozzle with clean water until all residue is gone.
- Dry all parts before adding paint.
- Check for cracks or damage to avoid leaks.
- Lubricate seals and moving parts for smooth operation.
Nozzle Selection
Choosing the right nozzle helps control paint flow and spray pattern. This affects the finish and efficiency.
| Nozzle Type | Best For | Spray Pattern |
|---|---|---|
| Fan Nozzle | Even coverage on walls and fences | Wide, flat spray |
| Cone Nozzle | Small areas and touch-ups | Circular spray |
| Adjustable Nozzle | Versatile use for different paint types | Variable spray |
Pros And Cons Of Using Garden Sprayers For Paint
Garden sprayers are tools made for watering plants. Some people try to use them to spray paint. This can save money but also brings challenges.
It is important to know the good and bad points before using a garden sprayer for paint. This helps you decide if it fits your project.
Advantages
Garden sprayers can cover large areas quickly. They use a pump to spray paint, which can be faster than brushes.
They are easy to hold and move around. This makes them good for outdoor walls or fences.
- Cost-effective compared to some paint sprayers
- Simple to use with basic training
- Good for thin paint types
- Can reach tight spaces and corners
Limitations
Garden sprayers are not made for thick paint. They may clog or spray unevenly with certain paints.
Cleaning the sprayer after paint use is hard. Paint can stick inside and damage the sprayer.
- Not suitable for thick or textured paints
- May cause uneven paint layers
- Difficult to clean after painting
- Limited control over spray pattern
Step-by-step Painting With Garden Sprayers
Using a garden sprayer for paint can save time and effort. It allows you to cover large areas quickly and evenly.
This guide explains how to prepare, mix, spray, and finish your paint job with a garden sprayer.
Surface Preparation
Clean the surface to remove dirt, dust, and loose paint. Sand rough areas to make the surface smooth.
Cover plants and floors with plastic sheets to avoid unwanted paint stains.
- Wash with soap and water
- Scrape off peeling paint
- Sand rough spots
- Use tape to mask edges
Mixing And Loading Paint
Choose paint that works with spray equipment, like latex or acrylic. Thin the paint if it is too thick.
Pour the paint into the garden sprayer tank. Make sure the sprayer is clean before loading paint.
- Check paint label for thinning instructions
- Use water or thinner as needed
- Mix paint well for uniform color
- Fill sprayer tank but do not overfill
Spraying Technique
Hold the sprayer nozzle about 12 inches from the surface. Spray in even, steady strokes for full coverage.
Overlap each pass slightly to avoid missed spots. Move your arm smoothly to keep paint layers thin and even.
- Keep nozzle distance steady
- Spray in horizontal or vertical lines
- Overlap passes by 50%
- Do not stay too long in one spot
Drying And Finishing
Let the paint dry completely before applying another coat. Drying time depends on paint type and weather.
Clean the sprayer after use to prevent clogs. Remove leftover paint and rinse all parts with water or thinner.
- Check paint label for drying times
- Apply extra coats if needed
- Store sprayer clean and dry
- Dispose of leftover paint safely
Common Issues And Troubleshooting
Using a garden sprayer for paint can lead to some common problems. These issues affect how well the paint covers surfaces.
Knowing how to fix these problems helps you get better results and save time.
Clogging Problems
Garden sprayers are not made for thick liquids like paint. Paint can block small openings inside the sprayer.
Clogs stop paint from spraying smoothly and cause uneven spots on your project.
- Check the nozzle for dried paint or debris
- Clean the nozzle with water or a thin wire
- Use thinner paint or mix paint with water before spraying
- Flush the sprayer with water after each use
Uneven Coating
Uneven coating happens if the paint flow is not steady. It can make some areas look thicker or patchy.
This issue may occur if you spray too fast or hold the sprayer too close or far from the surface.
- Keep a consistent speed while spraying
- Hold the sprayer 6 to 12 inches from the surface
- Keep the sprayer moving in smooth, even strokes
- Make sure paint is well mixed and thin enough
Pressure Loss
Pressure loss makes the sprayer weaker and reduces paint flow. It can happen if the sprayer leaks or the pump is faulty.
Low pressure causes weak spray and poor coverage on your surface.
- Check all seals and hoses for leaks
- Make sure the pump is working and pumping air correctly
- Fill the sprayer with enough paint or liquid
- Clean the filters and nozzle regularly
Alternative Tools For Painting
Using a garden sprayer for paint is not the best choice. Garden sprayers are made for water and light liquids. Paint needs special tools to spread evenly and last long.
There are better tools made just for painting. These tools help you apply paint smoothly and save time. Let’s look at some popular options.
Airless Paint Sprayers
Airless paint sprayers use high pressure to spray paint. They work well for large surfaces like walls and fences. The paint comes out fast and covers evenly.
These sprayers save time and reduce brush marks. You need to clean them well after use. They work with thick paints and primers.
Hvlp Sprayers
HVLP stands for High Volume Low Pressure. These sprayers use low pressure to spray paint gently. They are good for detailed work and small projects.
HVLP sprayers create less overspray. You get smooth finishes on furniture and cabinets. They need thinner paint to work well.
Brushes And Rollers
Brushes and rollers are the oldest painting tools. Brushes help you paint edges and small areas. Rollers cover large flat surfaces quickly.
These tools give good control over paint thickness. They work well with all paint types. Brushes and rollers are easy to clean and reuse.
- Brushes: Best for corners and trim
- Rollers: Ideal for walls and ceilings
- Both tools give smooth, even coats
Safety Tips When Using Garden Sprayers For Paint
Using a garden sprayer for paint can save time and effort. It helps cover large areas quickly. But paint and garden sprayers need careful handling to stay safe.
Follow safety tips to avoid accidents and health problems. This guide covers key points about protective gear, ventilation, and disposal.
Protective Gear
Always wear the right protective gear when spraying paint. Paint can irritate your skin and eyes. Breathing paint fumes is harmful too.
Use gloves, goggles, and a mask made for paint spraying. Wear long sleeves and pants to protect your skin. Closed shoes keep your feet safe from spills.
- Wear chemical-resistant gloves
- Use safety goggles to protect eyes
- Put on a respirator or mask for fumes
- Cover skin with long sleeves and pants
- Wear closed-toe shoes
Ventilation
Good airflow is important when using garden sprayers for paint. Paint fumes can build up and cause dizziness or headaches. Spray paint outside or in a well-ventilated area.
If you spray indoors, open windows and doors. Use fans to move fresh air in and fumes out. Never spray paint near open flames or sparks.
- Spray outdoors if possible
- Open windows and doors indoors
- Use fans for better air flow
- Avoid spraying near fire or sparks
Proper Disposal
Dispose of leftover paint and cleaning water safely. Pouring paint down drains or on the ground harms the environment. Follow local rules for paint disposal.
Clean your garden sprayer outside and catch the rinse water. Take unused paint and rinse water to a hazardous waste site or recycling center.
- Do not pour paint down drains
- Clean sprayer outdoors with care
- Collect rinse water for safe disposal
- Use local hazardous waste facilities
- Recycle paint cans if possible
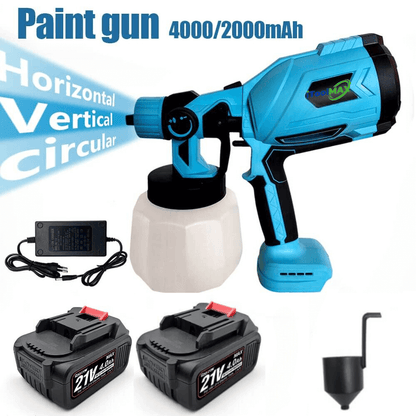
Credit: www.itoolmax.com
Frequently Asked Questions
Can I Use A Garden Sprayer To Paint Walls?
Yes, you can use a garden sprayer for paint. However, it works best with thin, water-based paints. Thick paints may clog the nozzle. Clean the sprayer thoroughly after use to avoid damage.
Is A Garden Sprayer Ideal For Spray Painting?
A garden sprayer is not ideal for spray painting. It lacks the fine control and nozzle precision of a paint sprayer. It’s better suited for large, rough surfaces and outdoor projects.
How Do I Prepare Paint For A Garden Sprayer?
To prepare paint, dilute it with water or paint thinner. Strain the paint to remove lumps. Test the mixture to ensure smooth spraying. Proper preparation prevents clogging and ensures an even coat.
Can A Garden Sprayer Handle Oil-based Paints?
Garden sprayers are generally designed for water-based liquids. Oil-based paints can damage the sprayer’s seals and nozzles. Use a sprayer specifically made for oil-based paints to avoid problems.
Conclusion
Exploring alternative uses for tools can be rewarding. A garden sprayer might handle paint in small tasks. It’s crucial to clean it thoroughly after use. Consider the sprayer type and paint consistency. Proper technique ensures a smooth finish. Always test on a small area first.
This prevents unwanted surprises. Safety should always be a priority. Wear protective gear like goggles and masks. Keep in mind, professional equipment often yields better results. For major projects, traditional paint tools are recommended. Adapting garden sprayers for paint can be a fun experiment.
Just ensure you follow best practices for success.