
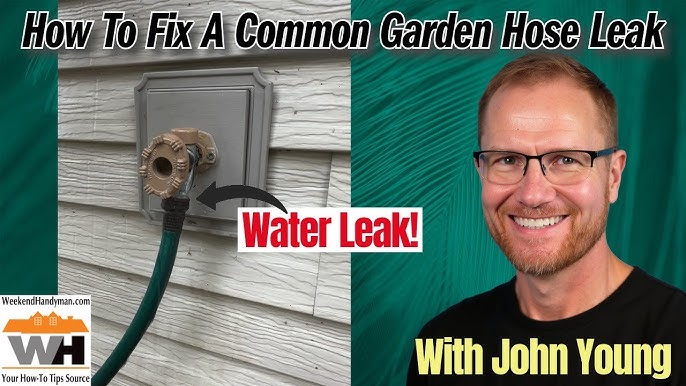



Is your garden hose leaking water right in the middle of your watering routine? A hole in your hose can turn a simple task into a frustrating mess.
But don’t worry—you don’t need to buy a new one just yet. Fixing a garden hose with a hole is easier than you think, and with a few simple steps, you can save time, money, and water. Keep reading, and you’ll learn how to quickly stop those leaks and get your hose working like new again.
Identify The Leak
Finding the leak in your garden hose is the first step to fixing it. You need to check the hose carefully to spot any damage.
Knowing the exact place of the hole helps you repair the hose properly and save water.
Check For Visible Damage
Look along the hose for cracks, holes, or worn spots. These damages may cause water to leak out.
- Examine the entire length of the hose
- Feel for soft or thin areas
- Look for signs of wear near connectors
- Check for cuts or punctures
Locate The Exact Spot
Once you find a damaged area, you need to confirm the exact spot of the leak.
| Method | Description |
|---|---|
| Water Test | Turn on the water and watch for dripping or spraying |
| Feel for Wetness | Run your hand along the hose to find damp areas |
| Listen Closely | Hear for hissing or spraying sounds where the leak is |

Credit: www.familyhandyman.com
Gather Repair Materials
Fixing a garden hose with a hole is easy if you have the right materials. Preparing the tools and repair kits first saves time.
Gathering everything you need before starting helps the repair go smoothly. This guide shows what to collect.
Essential Tools
You need a few basic tools to fix a garden hose. These tools help cut and secure the hose properly.
- Utility knife or sharp scissors to cut the hose cleanly
- Adjustable wrench or pliers for tightening fittings
- Marker to mark the hole location
- Rag to clean the hose before repair
- Measuring tape to measure the damaged area
Recommended Repair Kits
Repair kits make fixing a garden hose simple. They include parts made for quick patching or replacing sections.
- Hose mender kits with connectors to join hose ends
- Rubber patch kits with adhesive for small holes
- Clamps to hold patches or connectors in place
- Replacement washers to stop leaks at fittings
Temporary Fixes
Finding a hole in your garden hose is frustrating. You need a fast way to stop the leak. Temporary fixes help you keep watering until you can replace or fully repair the hose.
These quick solutions are easy to do at home. They save water and prevent more damage while you plan a permanent fix.
Using Tape For Quick Sealing
Tape is a simple tool to stop leaks fast. Wrap it tightly around the hole to block water from escaping. Choose a strong tape that sticks well to wet surfaces.
Waterproof duct tape or silicone repair tape works best. Press the tape firmly and overlap layers for better sealing. This fix works well for small holes and cracks.
- Clean the hose area around the hole
- Dry the area as much as possible
- Wrap tape tightly around the hole
- Overlap tape layers for a strong seal
- Check the tape regularly for leaks
Applying Waterproof Sealant
Waterproof sealant is another quick fix for garden hose holes. It creates a watertight patch that lasts longer than tape. Use a sealant designed for rubber or plastic surfaces.
Apply the sealant over the hole and let it dry fully before using the hose. This method works well for medium-sized holes and can extend the life of your hose.
- Clean and dry the damaged area
- Apply a thick layer of sealant over the hole
- Spread it evenly around the hole
- Let the sealant dry as per instructions
- Test the hose carefully after drying
Permanent Repair Methods
A garden hose with a hole can waste water and cause frustration. Fixing it right keeps your hose working longer.
Permanent repairs stop leaks and avoid the need to replace the hose. Here are two common ways to fix holes.
Patch With Rubber And Clamps
You can patch small holes using rubber pieces and hose clamps. This method seals the hole tightly.
First, clean the hose surface around the hole. Cut a rubber patch slightly bigger than the hole.
- Wrap the rubber patch over the hole.
- Place two hose clamps on each side of the patch.
- Tighten the clamps firmly to seal the patch.
- Check for leaks before use.
Replace Hose Section With Couplings
If the hole is large or the hose is badly damaged, remove that section. Use hose couplings to join the cut ends.
Cut out the damaged part with a sharp knife. Insert each end of the hose into the coupling and tighten the screws.
- Measure and mark the damaged section.
- Cut out the bad part cleanly.
- Push the hose ends into the coupling firmly.
- Tighten the clamps or screws on the coupling.
- Test the hose for leaks.
Prevent Future Damage
Fixing a garden hose with a hole is helpful. Taking care of it helps it last longer. Preventing damage saves money and effort.
Proper care stops new holes and leaks. Learn easy ways to keep your hose strong and useful.
Proper Hose Storage
Store your hose in a dry place after use. Keep it away from direct sunlight and sharp objects.
Use a hose reel or hanger to keep it off the ground. This prevents dirt and damage from heavy foot traffic.
- Drain water from the hose before storing
- Coil the hose loosely to avoid stress
- Keep the hose indoors during winter
- Use a cover to protect from sun and rain
Avoiding Sharp Bends And Kinks
Sharp bends and kinks weaken the hose material. They cause cracks and holes over time.
Uncoil the hose fully before use. Move it gently around corners without forcing sharp turns.
- Use hose guides to prevent tight bends
- Pull the hose straight when watering
- Avoid dragging the hose over rough surfaces
- Check for kinks often and fix them quickly

Credit: www.reddit.com
When To Replace The Hose
Knowing when to replace a garden hose can save you time and water. Small leaks might be easy to fix. But some damage means it’s time for a new hose.
Check your hose often. Look for signs that show it no longer works well. This helps you decide if repair is enough or replacement is better.
Signs Of Extensive Wear
Look for these signs on your garden hose. They show when the hose is too worn to fix easily:
- Cracks or splits along the length of the hose
- Large holes that let water gush out
- Stiff or brittle sections that crack when bent
- Leaks near the connectors or fittings
- Frequent kinks that damage the hose wall
Cost Vs. Repair Considerations
Decide if fixing your hose is worth the cost. Sometimes, buying a new hose saves money and hassle.
| Factor | Repair | Replacement |
| Material Cost | Low for small holes | Higher upfront cost |
| Time | Short for minor fixes | No repair time needed |
| Durability | Temporary fix | Long-lasting solution |
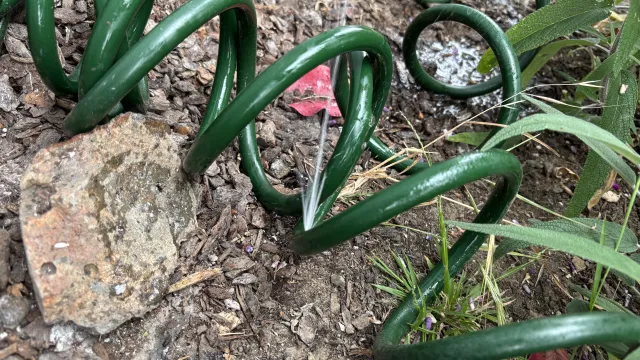
| Water Waste | May continue if leaks persist | Stops all leaks |
Credit: ucanr.edu
Frequently Asked Questions
How Do I Repair A Small Hole In My Garden Hose?
To fix a small hole, use waterproof tape or a hose repair kit. Clean the area, dry it, then apply the tape or patch. This stops leaks quickly and extends the hose’s life.
Can I Fix A Garden Hose Without Replacing It?
Yes, you can repair a hose using a patch kit or hose mender. These solutions are affordable and easy, saving you from buying a new hose.
What Materials Do I Need To Fix A Garden Hose Hole?
You will need waterproof tape, hose repair kit, scissors, and a clean cloth. These tools help seal the hole effectively and prevent leaks.
How Long Does A Garden Hose Repair Last?
A proper repair can last several months to years. It depends on the damage size and how well you apply the fix.
Conclusion
Fixing a garden hose is simple and cost-effective. First, identify the leak. Then, gather a repair kit or tape. Clean the hose area around the hole. Apply the patch or tape securely. Test the hose to ensure no leaks remain.
Regular maintenance prevents future issues. Remember, a little care saves time and money. Enjoy uninterrupted watering with your repaired hose. Keep your garden thriving with this easy fix. Happy gardening!